monorepo搭建流程
0. 准备
tip
- 搭建 monorepo 前必须要准备一个 git 仓库。
- 在本地或者远程服务器全局安装
verdaccio,利用 PM2 守护进程。 - 需要创建 npm 账号,用于发布包。
0.1. 创建 git 仓库
tip
最好用私有仓库哦
0.2. 安装 verdaccio
info
sudo npm i verdaccio -g
检查目录,MacOS 默认安装在/Users/[你的电脑username]/.config/verdaccio。
verdaccio
├── config.yaml  # 配置文件
└── htpasswd
# 🎈 包
# path to a directory with all packages
storage: /Users/black-jay/.local/share/verdaccio/storage
# path to a directory with plugins to include
plugins: ./plugins

# 🎈 页面基本配置
web:
  enable: true
  title: Black-Jay私有仓库(本地)
  primary_color: "#000"
  html_cache: true
  darkMode: true

# 🎈
auth:
  htpasswd:
    file: ./htpasswd

# 🎈 设置代理
uplinks:
  npmjs:
    url: https://registry.npmjs.org/

# 🎈 权限控制
packages:
  "@*/*":
    access: $authenticated
    publish: $authenticated
    unpublish: $authenticated
    proxy: npmjs

  "**":
    access: $all
    publish: $authenticated
    unpublish: $authenticated
    proxy: npmjs

server:
  keepAliveTimeout: 60

middlewares:
  audit:
    enabled: true

# log settings
logs: { type: stdout, format: pretty, level: http }

# 🎈 对外ip 端口
listen: http://127.0.0.1:4873
0.3. 安装 PM2
info
sudo npm i pm2 -g
# 启动 verdaccio
pm2 start verdaccio

# 重启 verdaccio
pm2 restart verdaccio

# 停止 verdaccio
pm2 stop verdaccio

# 查看进程
pm2 list

# 查看日志
pm2 logs
:::::::::::::::🎉🎉🎉::::::::::::::::::

0.4. 创建 npm 账号
# 查看当前用户
npm whoami --registry=http://127.0.0.1:4873

# 增加用户
npm adduser --registry=http://127.0.0.1:4873

# 登录
npm login --registry=http://127.0.0.1:4873

# 退出登录
npm logout --registry=http://127.0.0.1:4873
danger
输入 passwork 时,不会显示,输入完毕后回车即可,需输入常规密码。
tip
上述准备工作完成后,就可以开始搭建 monorepo 了。
1. pnpm
1.1. 初始化
pnpm init -y
1.2. pnpm workspace 创建工作区
# 创建工作区
mkdir packages
# pnpm-workspace.yaml
packages:
    - 'packages/*'
1.3. npmrc 代理仓库
# .npmrc
registry=http://127.0.0.1:4873
# 开启workspace
link-workspace-packages=true
# 共享锁文件
shared-workspace-lockfile=false
2. 安装 lerna
2.1. 安装
# -w 指定工作目录 -w代表根目录
pnpm install lerna@latest -D -w
2.2. 初始化
pnpm dlx lerna init
生成lerna.json文件
{
  "npmClient": "pnpm",
  "useNx": true,
  "useWorkspaces": true,
  // independent 模式下,每个包都有自己的版本号
  // fixed 模式下,所有包的版本号一致
  "version": "independent",
  // packages项目中位置
  "packages": ["packages/*"],
  // 发布地址
  "publishConifg": {
    "registry": "http://127.0.0.1:4873"
  },
  // lerna publish 时,自动打Tag
  "command": {
    "publish": {
      "ignoreChanges": ["test"],
      "message": "chore: release"
    }
  }
}
3. 常用命令
3.1. 创建包
lerna create @im/utils
# 改造下@im/utils的package.json
{
  "name": "@im/utils",
  "version": "1.0.0",
  "description": "> TODO: description",
  "author": "郗子硕 <xzsblackjay@163.com>",
  "homepage": "https://github.com/**/my-monorepo#readme",
  "license": "ISC",
  "main": "src/index.ts",
  "publishConfig": {
    "registry": "http://127.0.0.1:4873"
  },
  "repository": {
    "type": "git",
    "url": "git+https://github.com/**/my-monorepo.git"
  },
  "scripts": {},
  "bugs": {
    "url": "https://github.com/**/my-monorepo/issues"
  }
}
3.2. 首次发布包
# 首次发布
lerna publish from-package
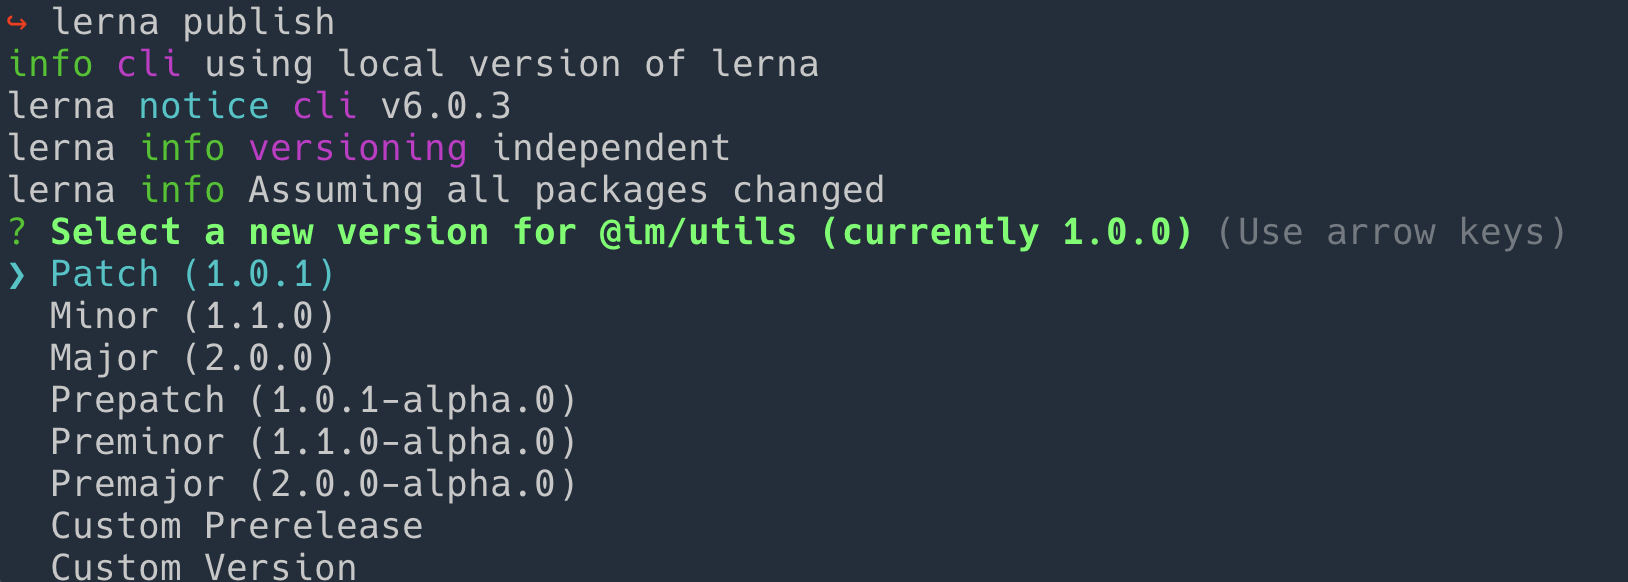
3.3. 发布包
lerna publish
pnpm --filter @im/utils install jquery -S
// @im/utils/src/index.ts
import $ from "jquery";
console.log("___utils___:  ", $);
export { $ };
3.4. 包与包之间的依赖
pnpm --filter <pkg> install <pkg> -S
# or
pnpm -F <pkg> install <pkg> -S
lerna create @im/hooks
pnpm --filter @im/hooks install @im/utils -S
import { $ } from "@im/utils";
console.log("___hooks___:  ", $);
ts-node packages/hooks/src/index.ts
danger
一定要在 tsconfig.json 中添加
"esModuleInterop": true
@types/node
{
  "compilerOptions": {
    "esModuleInterop": true
  }
}
pnpm i @types/node -w -D
发包试试~~
3. 案例一:共享配置
之后更新吧